RV Solar Panels: Prices and Installation Costs
Installing solar panels on an RV can cost about $400 to $1000 or even more. The bigger your RV and the frequent you use it, the more you will spend on installation. There are RV solar panel kits available on the market so you can find one that will suit your RV.
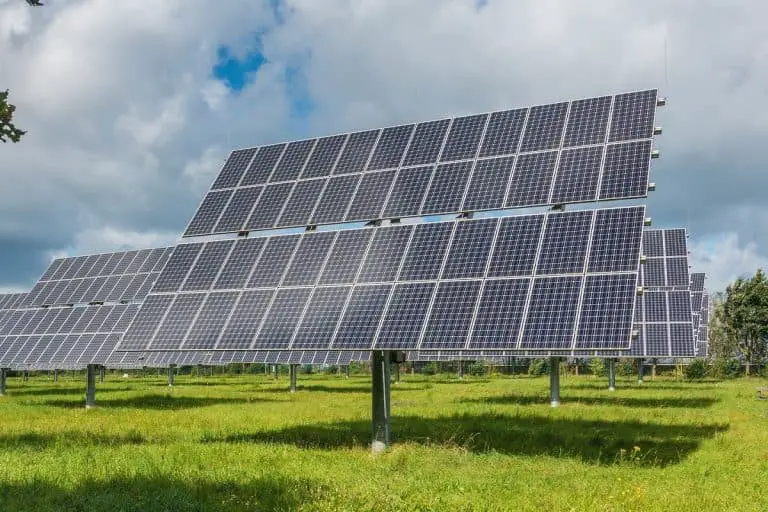
Camping in places where you cannot get electricity from a grid is a common adventure. Solar power installation on RVs is becoming more and more popular among campers. This power source only needs sunlight to charge RV batteries and power appliances.
You cannot simply set a budget you want to spend on solar installation. The reason is that factors determine how much it costs to install solar panels on an RV.
In this article, we will discuss the factors that affect the cost of solar power system installation on an RV and how much an RV solar power kit can cost.
Top Three Factors To Consider When Installing Solar Panels On An RV
The Size Of Your RV
The size of your motorhome will impact the installation of solar panels. RV campers have four sizes divided by their classes:
- Class A – 21 to 45 ft.
- Class B – 17 – 19 ft.
- Class B+ – 20 to 30 ft.
- Class C – 20 to 31 ft.
The larger your camper is, the more appliances you can put inside it. And if you have many appliances inside your RV, you need more solar energy to power them. Fortunately, you can install more solar panels on the roof of a large motorhome.
Your RV’s Battery Capacity
The size of your RV’s battery bank is essential as it tells how long you can stay in a camp. If you often go off-grid camping in areas far away from where there are electric hookups, you will need a large battery bank to support your camping needs. This large battery bank will take a long period to charge up.
So, if you are planning to power your RV using solar energy alone and you have a large RV battery, say 12 volts and 20 amps in size, you need a 300-watt solar panel or more to charge it. You can also install 3 x 100-watt solar panels to achieve the wattage required by the RV battery.
If you are not sure about the wattage of your battery bank, you can get it by simply looking for its voltage and ampere. You can find this information written somewhere on the battery. Then, multiply the voltage by the ampere, and the resulting number will be your RV battery’s wattage.
Once you have the wattage of your RV battery, you will be able to figure out how many solar panels it will take to charge it.
The Amount Of Electricity Consumed By Your RV Appliances
While your RV’s battery bank will provide your appliances with the electricity, they need to work when no electric hookups are available. However, it is also essential to know the amount of electricity your RV appliances consume. This way, you can ensure that your battery and solar panels provide enough electricity for the vital appliances you need when camping.
You can find out your RV power usage by installing a battery monitor. We recommend the Renogy 500A Battery Monitor.
Renogy 500A Battery Monitor Features
- Shunt
- High and low voltage programmable alarm
- 20 ft. shielded cable
It is compatible with all RV batteries, offering an accurate real-time current and voltage draw measurement. The transparent shunt holder makes the device easy to install. At the same time, the 20 ft. cable lets you monitor the battery at a far distance.
Moreover, you can also estimate your motorhome’s RV power consumption manually. However, it would take a lot of math, so using a battery monitor is better and more accurate.
Components Of An RV Solar Panel System

Equipping your RV with solar energy is not as simple as buying and attaching a few solar panels to the camper’s roof. Solar power systems for motorhomes have several components that ensure their safety and efficacy in providing the electricity you need.
That said, the solar power system components you will install on your motorhome also significantly affect how much it costs to install solar panels on an RV.
Solar Panels
There are three types of solar panels:
- Rigid – the heaviest, most durable, and most efficient type of solar panel.
- Portable – you can place this type of solar panel anywhere on and off your RV, allowing it to capture sunlight even when you park your motorhome in a shaded area.
- Flexible – lightweight and ideal for a motorhome with a molded roof.
A rigid solar panel can generate up to 300 watts of solar energy. On the other hand, portable and flexible solar panels have a maximum wattage of 150.
If you are using a large battery bank for your RV, you can either install one 300-watt solar panel or two to three 150-watt of flexible or portable types.
Batteries
The majority of motorhomes utilize two battery banks. One of the batteries is for starting the engine, while the other is for running the DC-powered appliances. Both batteries usually have a voltage of 12 and 20 amperes, which means they have a wattage of 240.
However, you need more than 240 watts of solar panels to ensure that you will not overload your system. You need enough solar panels to make 300 watts or more electricity.
Motorhomes that rely on grid hookups have an inverter that provides 120 volts of electricity to power appliances. On the other hand, modern RVs utilize lithium iron phosphate batteries, which you can charge using solar energy. You can also charge the engine alternator of the RV via solar energy using a DC/DC charger.
These batteries will charge more rapidly via solar energy. They can also power your appliances for longer, making them an exceptional choice for off-grid use.
AC/DC Inverter
RVs usually come with inverters that convert the solar panels’ direct current (DC) electricity into alternating (AC) electricity for your appliances need to run. For this reason, you may no longer purchase a new inverter that you can connect to your solar power system.
But suppose you are planning to rely solely on solar energy to power your camper. In that case, it is ideal for switching to a high-quality inverter. Although high-quality inverters are expensive, they are more reliable and durable. So, you can ensure that your solar power system consistently produces and converts the electricity you need to power your electronics.
A high-quality inverter ensures that your battery bank and appliances receive the correct type of electricity, thus preventing accidents like short circuits.
Charge Controller
A charge controller is a device that prevents your RV’s battery bank from receiving too much electricity. It regulates the flow of electricity by matching the solar panels’ output voltage to the voltage needed by the battery. As a result, your battery will not overcharge, thus preventing damage from occurring.
When your RV’s battery bank has a low charge, the solar charge controller will supply a full flow of current from the solar panels. Once the battery reaches its maximum charge level, the solar charge controller will provide a lower electricity voltage known as the “trickle charge.” This way, the battery will remain fully charged, yet the flow of electricity will not be enough to overcharge it.
Moreover, there are two types of solar charge controllers:
Pulse Width Modulated Charge Controller (PWM)
It provides better control of the electrical flow from the solar panels to the batteries. PWM is also budget-friendly and provides better trickle charging capabilities. This type of charge controller is ideal for RVs used occasionally.
Maximum Power Point Tracking Charge Controller (MPPT)
More expensive but more beneficial and efficient than PWM. An MPPT charge controller gives motorhome owners more control and expandability towards their solar power system.
A PWM charge controller is ideal if you have a small, entry-level camper. On the other hand, an MPPT is suitable for large motorhomes with many appliances that the solar power system needs to run.
Transfer Switch
This solar power system component allows you to switch the power source from the battery to shore power. A transfer switch is essential in a campground where grid hookups are available.
Additionally, a transfer switch provides safety and convenience as you will no longer have to switch power sources manually. Once you connect the transfer switch to an AC power source other than what your solar panels produce, it will choose the appropriate power source based on where you want it to connect. For instance, you can prompt the transfer switch to power your refrigerator while driving. This way, you can turn the propane source on the road without cutting the power off your fridge.
How Much Does RV Solar Power Installation Cost?

With all the factors and components mentioned above, it is safe to say that the cost of solar power system installation on an RV will depend on one RV to another. If you are an occasional RV camper, you do not have to spend much installing solar panels. Meanwhile, part-time and full-time RV campers must invest in a high-quality and more powerful solar power system.
Fortunately, you can purchase RV solar kits depending on your RV’s electricity requirements.
Solar Panel Installation Kits
Alt Energy Options is an Amazon Associate. As an Associate, we earn commissions from qualifying purchases. The site also maintains other affiliate relationships. Purchases made through the site links don’t increase cost to the buyer. Full affiliate statement here.
For Small Motorhomes
If you own a small motorhome, a budget-friendly solar kit like the Renogy 200 Watts Monocrystalline RV Solar Panel Kit is a good choice from Amazon. You can also order directly from Renogy.
For $385, this kit includes:
- Two 100-watt 12 volts Monocrystalline solar panels
- 30 ft. 10 AWG solar adaptor kit
- 30 amps PWM charge controller
- 16 ft. 10 AWG tray cable
- Branch connectors
- Cable entry housing
Motorhomes already have battery banks and inverters, so you may opt to no longer purchase them. But a lead acid battery is ideal if you want to replace your batteries. This battery charges quickly, allowing you to power your electronics while camping off-grid.
For Large and Frequently Used Motorhomes
If you have a large RV or frequently camp off the grid, you need an RV solar installation kit with a high wattage and a few additional components. One ideal choice is the Renogy 400 Watts 12 Volts Monocrystalline Solar RV Kit. This solar installation kit includes:
- four 100-watt 12 volts Monocrystalline Solar Panels
- 16 ft. 1 AWG tray cable
- 30 ft. 10 AW MC4 adaptor kit
- three branch connectors
- cable entry housing
Off-Grid Camping
For campers often camping off-grid, it is ideal to use high-quality batteries that can handle the amount of energy produced by solar panels. We recommend that you install lead lithium batteries as they can store more solar power. You can also discharge and keep them for an extended period without acquiring damage.
A good battery for a solar-powered RV will cost approximately $200.
Moreover, you will also need a high-quality RV inverter, especially if you want to camp off-grid for an extended period. This way, you can ensure that your inverter efficiently converts DC to AC electricity. A high-quality inverter will allow you to run appliances without a grid electricity source.
It is also ideal to use an RV battery monitor. This device lets you see your battery bank’s remaining capacity in real-time. This same kit can be bought from Renogy at this link.
Estimated Cost For Installing A Solar Power System On An RV
With everything mentioned above, the estimated cost of installing a solar power system on a motorhome is $400 to $1000. It includes the actual RV solar power system kit, a battery, and an inverter. This installation cost is for RV owners who occasionally or frequently use motorhomes.
But if you are living in an RV full-time, you may need to spend up to $3000 for the cost of solar power system installation. The reason is that you need to install a system with high wattage to ensure that you will have electricity even when you do not charge your battery in a grid power source.
How Many Solar Panels Does An RV Need?
The number of solar panels an RV needs depends on its size and the appliances you use while camping. So, there are two factors that you need to understand to know how many solar panels your RV needs:
- The amount of energy the RV uses daily
- The amount of power the solar panels need to charge the batteries
Calculating The Daily Electricity Usage Of Your RV
The energy produced by solar panels is measured in watts. To get the daily electricity usage of your RV, you need to list all the appliances you are using and take note of their energy consumption in watts. You also need to list how long you use each appliance daily.
However, you will not always find the wattage of an appliance. In such cases, simply take note of the voltage and amperes of the devices.
For instance:
| Appliance | Voltage | Amperes | Number Of Hours Used Per Day |
| Microwave Oven | 120 volts | 5.4 amperes | 15 minutes |
Calculations
After listing all the appliances inside your RV, their voltage, and amperes, you next need to calculate their wattage. You can do this by simply multiplying the voltage and ampere of each appliance. Your equation will be
wattage = voltage x ampere
Now that you have the wattage of your RV appliances, you need to multiply the wattage by the number of hours used per day. It will allow you to get the daily electricity consumption of each appliance.
For instance, you are using your 648-watt microwave oven for 15 minutes daily, assuming you heat food multiple times daily. To get the daily electricity consumption:
162 watts (daily power consumption) = 648 watts x 0.25 (15 minutes)
Therefore, your microwave oven uses 162 watts of electricity per day.
Apply this computation formula to each appliance. Once you have all their daily power consumption, sum them up to find the daily electricity consumption of your RV. Once you know the wattage consumed by your RV daily, you will learn how many solar panels you need to install.
Calculating The Amount Of Electricity Needed To Charge Your RV Battery
Knowing how much power your batteries need to charge up is essential. You cannot install too many solar panels when you do not have enough batteries to store the electricity they produce. You also cannot have too few solar panels as they will not be able to charge the batteries to their total capacity.
Most of the time, the capacity of your RV batteries will only be a few watts higher than the wattage consumed by your appliances. You can get the wattage of your RV’s batteries by following the calculation of the appliances’ daily power consumption. So, if your appliances consume 1200 watts of electricity per day, your battery needs to receive 1200 watts of solar energy from the solar panels.
Assuming you plan to install 320-watt solar panels, you need four solar panels to provide the electricity your batteries, and RV appliances need.
How Do You Install Solar Panels On An RV?
Now that you understand the cost of installing a solar power system on your RV and how to get the number of solar panels you need, the next thing you need to learn is the actual solar power system installation. However, installing solar panels on your own is not ideal if you do not know enough about RVs and solar power systems. But if you think you can do the installation process by yourself, below is a guide to help you do the job:
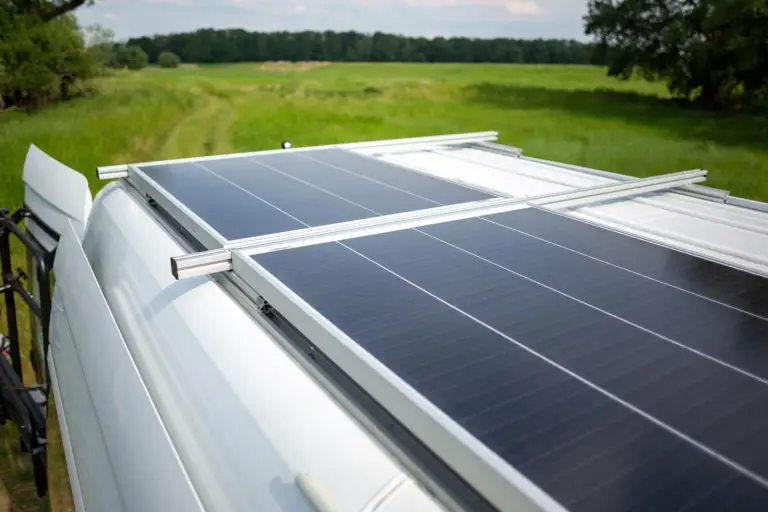
Find An Ideal Location For Your Solar Panels
The first step to installing a solar power system in your RV is to find the solar panels’ mounting location. RV owners who utilize solar energy usually mount their solar panels to the RV’s roof. However, the mounting location may vary depending on the type of solar panels you use.
If you are using rigid solar panels, the ideal mounting location is the roof of your camper. You will use screws to secure the panels in place. Meanwhile, you can also place your flexible solar panels on the roof of your motorhome. The only difference from rigid solar panels is that you can install them using screws or adhesive mounts.
Regardless of the type of solar panels you are using, make sure not to mount them on locations where there are RV components that can cast shade over them.
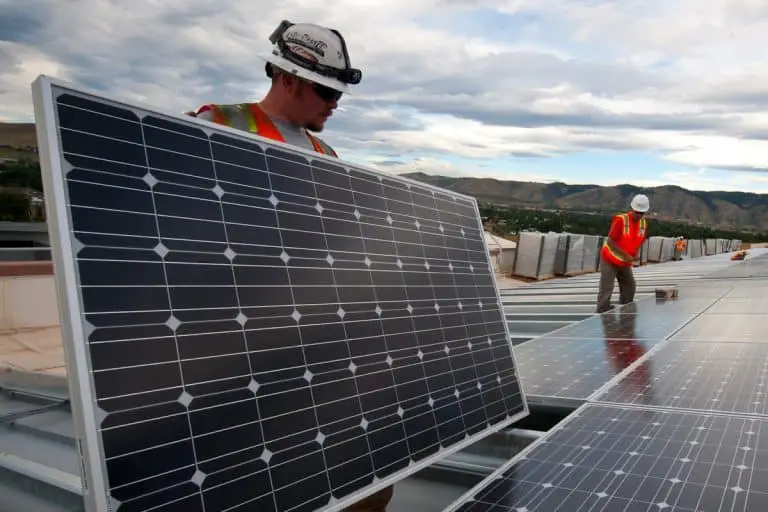
Securing The Solar Panels In Place
You can use brackets to put a small gap between the panels and your RV’s roof. If you opt to use brackets, you need to apply a sealant to the brackets. The adhesive will ensure that the brackets stay in place even if it rains.
Once the sealant is completely dry, you can proceed to screw the panels into the roof. Make sure that you are placing the screws on the panels’ frame.
Avoid shooting the panels with screws, as this mistake could lead to irreparable damage.
Install The Wires
Your solar power system’s wiring should run from the panels to the charge controller. You can run the wiring through the refrigerator vent if you do not want to add wiring holes to your RV.
If your refrigerator vent is too far from the charge controller, you have no choice but to drill holes where the wirings can run. You can run the wirings beside your RV’s plumbing pipe. Once the wires reach the charge controller, apply a sealant to the holes you made.
Alternatively, you can drill holes and run your system’s wiring into the interior wall of your RV. This way, you can hide the wiring and make them look neat. Just make sure to seal every hole that you drill to ensure that there will be no leakage when it rains.
Mount Your Charge Controller
The nearest possible area to the batteries is your charge controller’s best mounting location. This way, you will only need to use a short wire to connect the batteries and charge controller. If you cannot place the charge controller beside the batteries, it needs to be at least within a yard from the batteries.
After mounting the charge controller into the wall, you need to connect the wires to the charge controller. Your RV solar power kit will come with an instruction manual. Make sure to refer to it to learn the correct wiring procedure when connecting the solar panels to the charge controller.
To ensure you connect each end of the wire correctly, we recommend using a multimeter to test the wire’s polarity. Then, use tape to indicate each wire’s polarity. Once polarity testing is complete, you can proceed to connect the cables to the solar panels, batteries, and charge controller.
Install The Dc/Ac Inverter
Chances are you have AC-powered appliances inside your RV. If you want to use them, you need to install an inverter to convert DC electricity produced by your solar panels to AC.
The ideal installation position of the inverter is anywhere away from heat and other damaging elements. If you are unsure how to install the inverter, your RV solar power kit’s installation manual will tell you the steps.
After finding the ideal inverter mounting position, connect the negative and positive wires to the inverter. Next, connect the inverter to your RV electrical system, making sure to connect the negative cables first.
Once all the wires are running throughout your RV’s solar panels, charge controller, battery, inverter, and electrical system, your solar power system is good to go. You can now utilize sunlight to power your motorhome’s appliances. (source)
Takeaway
Three significant factors affect the cost of installing a solar power system in an RV. These are the RVs
- size,
- electrical consumption,
- RV battery capacity
An RV solar power kit can cost approximately $400 to $1000, depending on the abovementioned factors. If you plan to purchase an RV solar power kit, we recommend the Renogy 200 Watts Monocrystalline RV Solar Panel Kit and Renogy 400 Watts 12 Volts Monocrystalline Solar RV Kit.
If you live in an RV full-time, you may even spend up to $3000 for installing solar power.